These knickers or panties, depending on your country, are a midrise basic pattern. Perfect for starting with sewing panties and even een good start to sewing lingerie. You get to know the construction and learning how to sew picot elastic.
Level: Beginner lingerie maker. I would recomment some sewing experience, but with all those tutorials on the internet, you can do it. You have to find the technique that fits you.

Link: https://papertheorypatterns.com/products/stevie-knickers You just have to sign up for their newsletter and you get it into your mailbox in a couple of seconds.
The reason I started with panties was to use up my cotton jersey scraps. Because I made so many t-shirt, I was left with a lot of scraps. Too big to throw away, to small to make a bigger garment from it. And it took over more and more room. So I wanted to do something with it and that is how I came up with sewing panties.
I am still learning and getting better and better in it. I am trying different patterns and even I drew my own patterns. But so I stubled on this pattern.
It has a nice rise and it looked like I can alter the patterns easily to, let’s say, insert some lace, because the lines are easy. But first I had to try it out to see if I liked the fit and fee. So I did.
In this case I followed the tutorial on the website of Paper Theory. You can find that tutorial here. The reason I did was that they did it just a bit different than I did up to this point. And I am always on the lookout to see if there is a better way to do something. O and one last thing. This pattern package comes in a A4 and A0 size. So if you have a A0 printer, you do not have to go thru the cut and tape steps or you can source that out and let a business with a A0 printer to do it. I live in the country site and we do not have such a thing in the area, so I use A4.
So here is my journey.
First I printed the first page of the pattern, because it has a test square to see if your printer prints the right size. I mostly work in cm, so that is what I tested, but as you can see in the picture, you can use inches of cm.

My printer did a perfect job, so I printed the rest of the pages. Then I laid them all out in order. With panties you do not get a lot of pages, so it was easy to do it on my table. The reason I do that so that I get a visual test if I have every page, but also to get a feel for the layout and how the pattern pieces look.

Next I cut the left sides of the 5 pages that needed to slide over the pages to their left and I cut out the top of the bottom pages, so I can fit the pages onto each other.

And yes, I accidentely cut the bottom of page 6 too 🙂 But now that I got them all layed out and fitting, I could tape them together. I always do 1 piece on the cutting line and sometimes in the middele of 2 lines, to keep the pattern pieces together.

If you ever used A4 size patterns, you know how it can get wobbly on the edge of the papers you need to tape together. Because I already laid them flat and matched them, I do not get that anymore.
Next I did an extra step. Because I have ASD, if anything happens in the proces that needs my attention. For example, somebody at the door or my chickens in alarm modus, I need to leave my sewing room and do something completely different. Than I have to start back up. And that is a hard thing to do if you have to figure out which size you were using, what the line looks like, so I mark the lines with a coloured marker, so I can just get my paper rotary cutter (I have 2, one for fabric and one for all the other materials) and roll away. I needed size 10, so I marked those lines on different spots with pink this time.

Next I cut all the pieces out and layed them on the table to see if there are markings, read back to see if seam allowance was included (which in this pattern it is) and to have a feel how they will fit together. And I do not know if it is me, but the pattern pieces of panties always look big to me, but I trust the sizes.

Do not ask me about the pink color. The paper was white. Something with lighting. I do not know, because everything was the same.
But now you sea the front, the back and the gusset the pattern piece that connects the front and the back piece. You have to cut the gusset twice, one goes on the inside and the other on the outside of the panty.
Next I rumaged thru my stash and found a piece of fabric. The fabric was bought for pyjama pants I made for my seamstress course. And I had a perfect long strip left. And with what is left after de panties are made, I want to make a fitting top, so I get a set of flamingo undies 🙂

I use pattern weights and a rotary cutter for different reasons, but the main reason is that my hands need silversplints to be able to do anything. I can only do so much on one day with my hands, before they explode in pain or lose their muscle strenght, so this helps with getting more mileage out of my hands.
Next, as paper weights I use washers I bought in a diy shop with building materials ( in this case Hornbach, it is a German chain). They are cheap and effective. The stone is made by one of my daughters and also works perfectly. I asked her to make me more.
The next step is to lay out all the cut out pieces with the paper pattern pieces and check if I cut everything in the right amount out. In this case 1 front, 1 back, 2 gussets. And to keep everything nice and need and organized, I throw everything out in the bins (of course seperated, paper in the paper bin, plastic in the plastic bin, textile in the textile bin).

Next I have to find a picot elastic that will fit the fabric pattern and color, so I get out my box with picot elastics and just lay the once that I think might look good and lay them out next to the fabric.

I liked the pink, so I cut the pink picot elastic to the specified lenghts for my size on page 1 of the 7 pages pattern. 2 for the legs and 1 for the waist. And I layes them in their place. So know I have everything cut and layed out in a, for me, organized way.

Now the assembly starts.
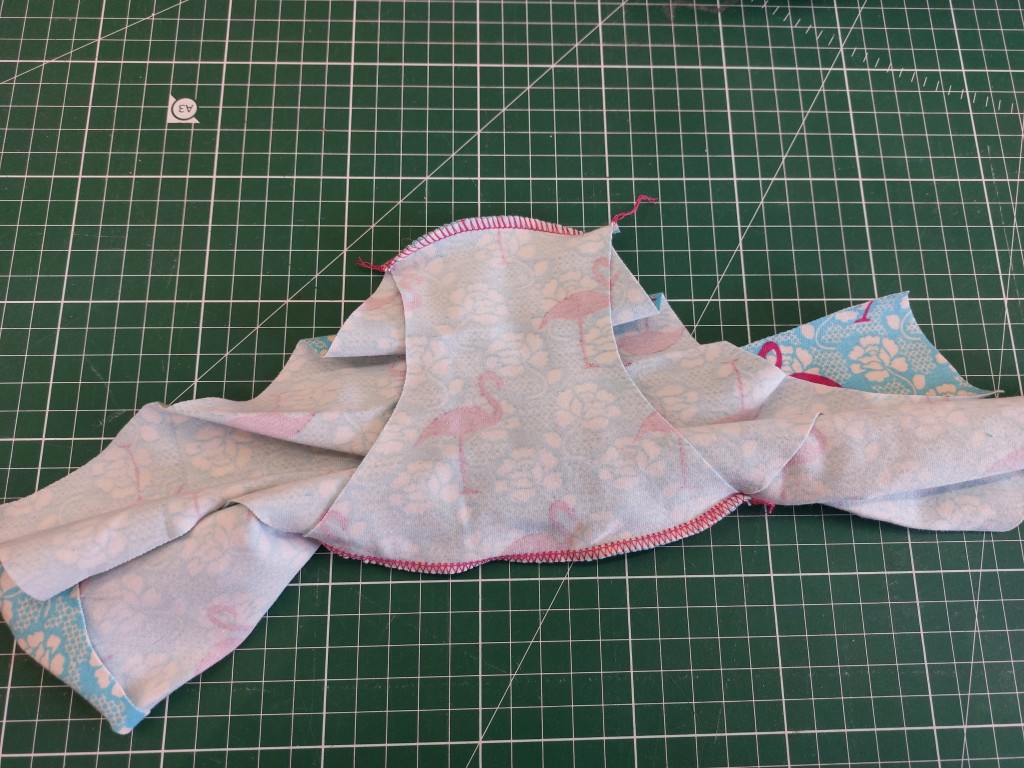
First I find the middle of the crotch side of the back piece by folding it in half and pin it. Than I find the middle in the same way of the wide side of the gusset and pin it. Than 1 gusset is placed with right side on the right side of the back piece and on e gusset is placed with the right side to the wrong side of the back piece and I pin the middle.

Than I work my way to the left and then to the right to pin them together.


Because I have a overlocker (Juki MO-644D with extender for 2 thread overlock stitch) I overlock the seam with a 2 thread stitch. That is to keep the seam as flat as can be. If you do not have an overlocker, use a small, narrow zigzag.

Next I do the same with the front piece to attach it to the gusset. The problem is that you have to use a way to get the 3 pieces onto each other in the right way and the gusset is already attached to the back piece. That is the same way as the back piece and gusset. I use the borrito method, so I roll the back piece so I can pin the pieces together in an unhindred way. So first the middle points and work myself to the outside of the seam.

Next I overlock that seam also with a 2 thread overlock seam.
Then I press the seams. Because it is a small piece with a curve I use my sewing ham.

Now it is time to attach the picot elastic. This is done by sewing it twice. First I devide the elastic and the seam to which it needs to be attached to in 4 even sections. I do that by folding it in half and pin it, than I fold each half also in 2 and pin it. The same thing I do to the seam. Than I pin those 5 points (begin, end, and 3 pins on 1/4, 1/2 and 3/4). And then I stretch the elastic (not the fabric) and pin it also in between with enough pins to be able to sew that section in a way that works for me. The side of the picot elastic that you want on the outside when it is finished, you have to punt that on the inside. Also, if you have elastic with a soft side, make sure that is the side that is faced up. Than zig zag it or overlock it. In this case I used a small zigzag stitch.

Then turn the picot elastic to the inside and zigzag it again, or, if you have a coverlock, you can also do that. I was “lazy”, so I just used the zigzag and not my coverlock. I was not in the mood to thread the coverlock. Make sure again to not stretch the fabric, only the elastic!

Next it is time to sew 1 side seam (yes, I am following the tutorial on their site). After I had sewn the side seam, I pressed it to one site and zagzagged it by means of topstitching. That way the seam will lay flat on my skin and will not bunch up. I am sensitive to how things feel. It happens 😀

Now we are getting to the finished point. Almost done. Now we have to attach the waist elastic. Same way as the legs. Divide it in sections , both the elastic and the fabric, pin it so you can easily sew and stretch the elastic for that section. Zigzag in on the outside as shown in the photo below.

Turn it to the inside and topstich it with a zigzag or coverlock or even a twin needle. An still, please do not stretch the fabric. It will make the seam do a wave.

Only one seam left. Sew the other side seam together and optional, topstich that seam also with a narrow zigzag. And then you have a finished panty.

Then the nice part is to put it on and feel the fit and look at it. For me it was a perfect fit. No indentations, no irritating seams or parts. Just perfect and it made me smile. No fit adjustment needed. So this one is a keeper.
Judgement: It was a perfect fit and really clear instructions in their tutorial. Also the extra information in the pattern package is really helpfull. I will definitely make it again, but than I want to cut the pattern pieces into more pieces so I can attach for example lace or I can play with colors. We will see. But I highly recommend the pattern.
5 Stars.
